Whole home lamp and RGB lighting conrol from your phone
Networked Lighting Control
Project Summary
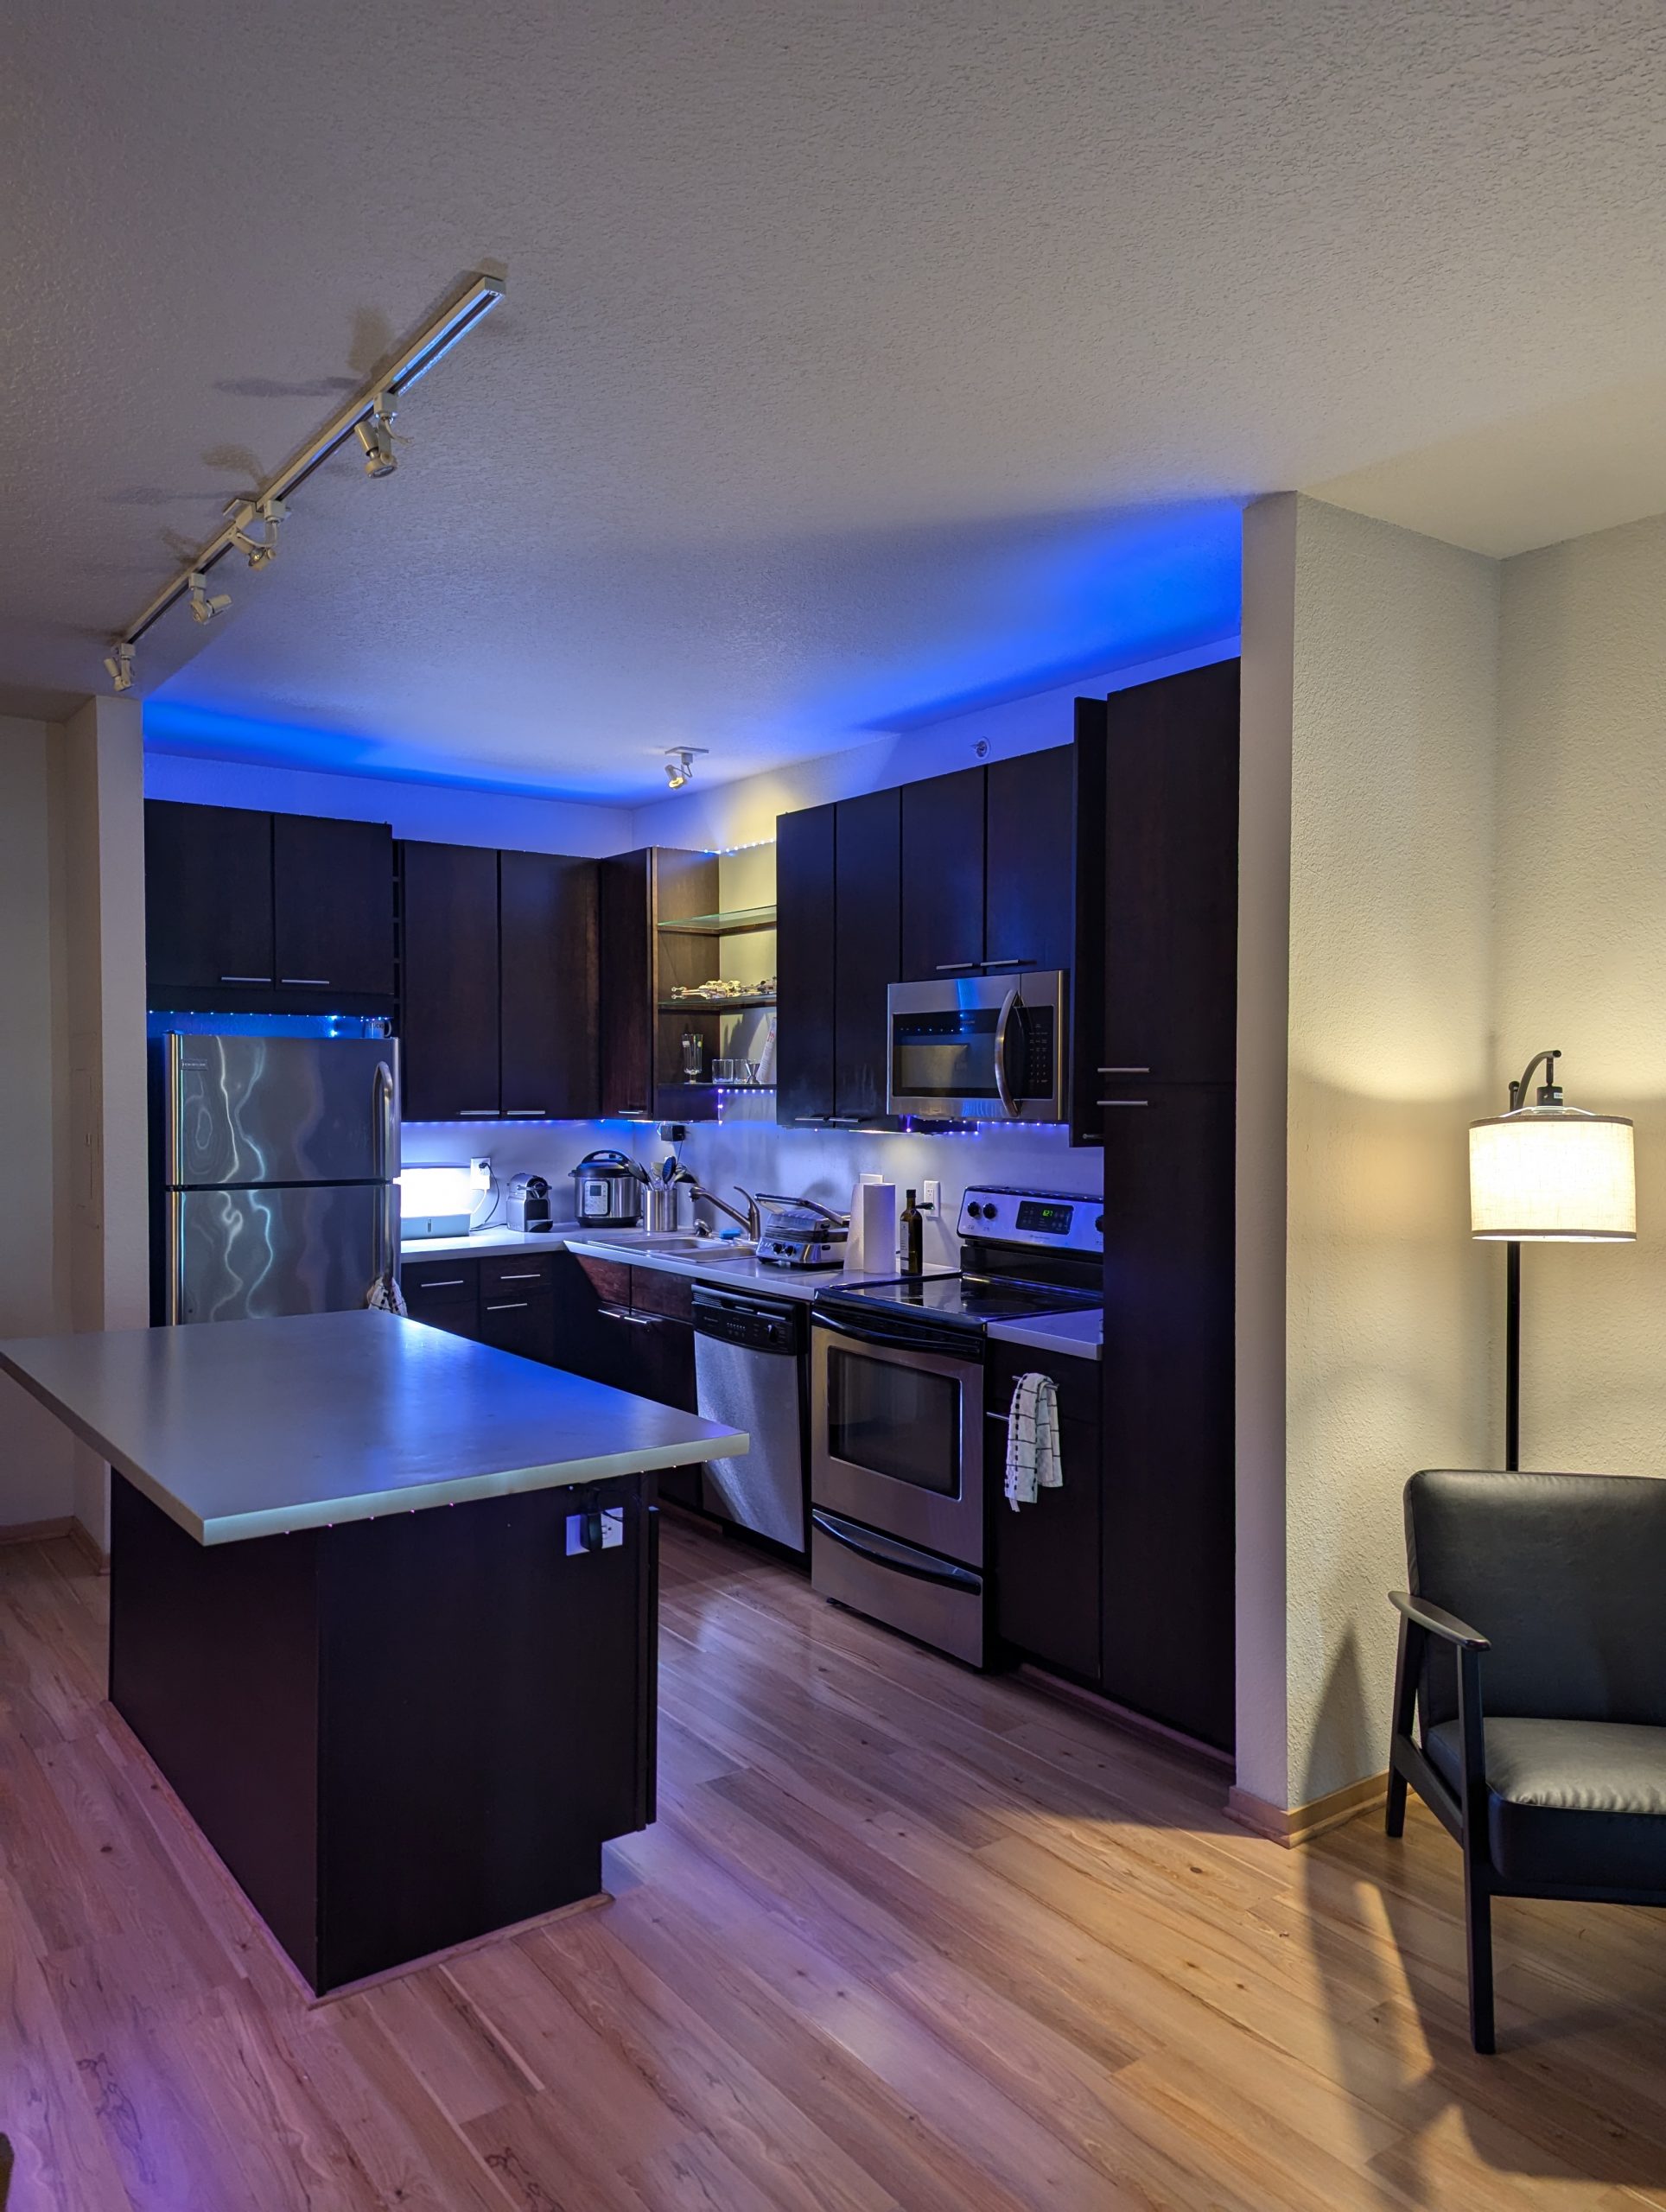
The following is an overview of the MQTT based lighting automation system I implemented in my apartment with a minimal hardware budget. The goal was to be able to select the color of RGB light strips from a web app and I later added controls to toggle my floor lamps. The system’s core is a Raspberry Pi that runs a Flask-based web application. This setup allows me to interface with the ESP32s remotely via a browser, using MQTT. Let me break down how the different components work together.
Discussion of Theory
The Python backend is the core logic that manages communication between the Flask web app and the ESP32 devices. The Raspberry Pi acts as the MQTT client, connecting to the broker on my network at a static IP over port 1883. This Python script handles the MQTT connections, message publishing, and subscribing to topics. The ESP32 devices subscribe to topics that are dynamically generated based on their MAC addresses, ensuring that each device can be uniquely identified and targeted for commands. This allows me to send specific instructions—such as color changes for the RGB lights or toggling wall switches—by publishing messages to the relevant MQTT topics.
Flask serves as the middleware that links the Python backend to the user-facing HTML interface. Flask exposes several routes, such as /set_color, which accepts POST requests from the front end. These requests carry JSON payloads containing the ESP32 ID and the desired RGB values. Flask’s role is to parse these requests and pass them to the appropriate functions in Python, which handle publishing the necessary MQTT messages. Flask also manages the connection logic, ensuring that the application can maintain communication with the MQTT broker even if there are temporary disruptions.
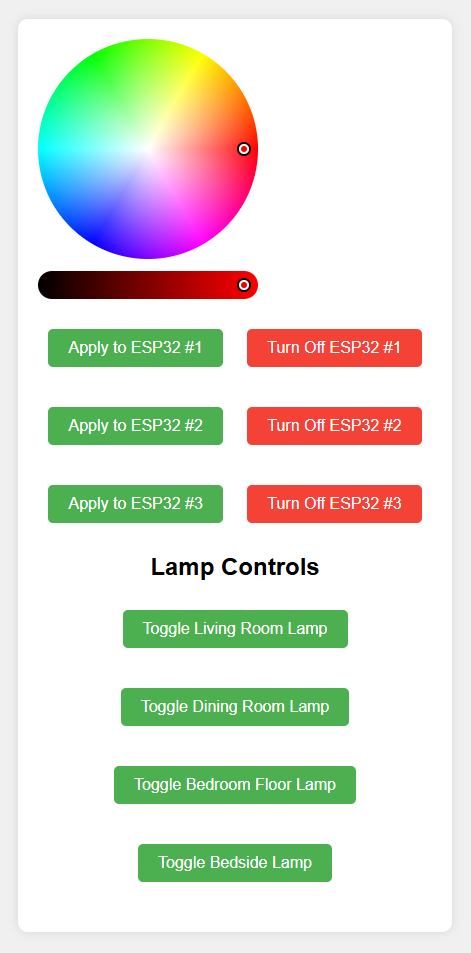
The HTML front end provides the user interface including the color wheel and buttons for each of the three strips and four wall light switches. The interface is simple anyone on my network can select a color and assign it to a strip, shut off that srip entirely with button press, or toggle lamps connected to the ESP32s using buttons. Once an action is taken on the web interface, JavaScript captures the input (such as RGB values or a toggle request) and sends it to Flask as an HTTP POST request. Flask then invokes the corresponding Python functions, which generate the MQTT messages that get published to the ESP32’s subscribed topics.
The ESP32 devices are programmed to subscribe to topics based on their MAC addresses, such as esp32_{MAC_address}/rgb/set_color for RGB control, and esp32_{MAC_address}/toggle for wall switch toggling. This method means that while I used a static IP for the Raspberry Pi, I didn’t need to bother with static IP’s for the peripheral devices. Each ESP32 processes incoming messages using callbacks, handling JSON payloads for setting RGB colors, or simple string messages for turning off lights or toggling switches.
Initially for selecting an RGB color during testing I just sent three JSON messages in quick succession for the individual 8-bit values. This worked fine, and sending three messages in a row was too fast for the eye to see, but it felt sloppy, and I have since revised my code to send everything in a single message.
In summary, Flask handles routing and request processing, acting as the interface between the web browser and Python’s MQTT logic. The Python code manages MQTT messaging, connecting the Raspberry Pi to the ESP32 devices via the broker. The HTML and JavaScript on the front end provide a simple interface, allowing anyone connected to the network to send commands to my peripheral devices.

Hardware Considerations
The three RGB strip controllers are as bare bones as can be. They consist only of an ESP32, an adjustable DC-DC converter to power it, and three N-channel mosfets to switch the three channels on the low side. The PWM frequency is low enough that I did not need resistors on the gates of the mosfets. The limited current I can draw from the ESP32 GPIO does not seem to be a problem for gate driving at that frequency. The LED strips themselves were cheaply purchased from Amazon and are powered by 24 volt supplies. The strips themselves seem to be wired in series-parallel. The red lights appear dimmer than the other two colors so I added some scalers into the code to equalize things. The low quality of the strips mean that the colors will never be close to perfect, but its fine for mood lighting.
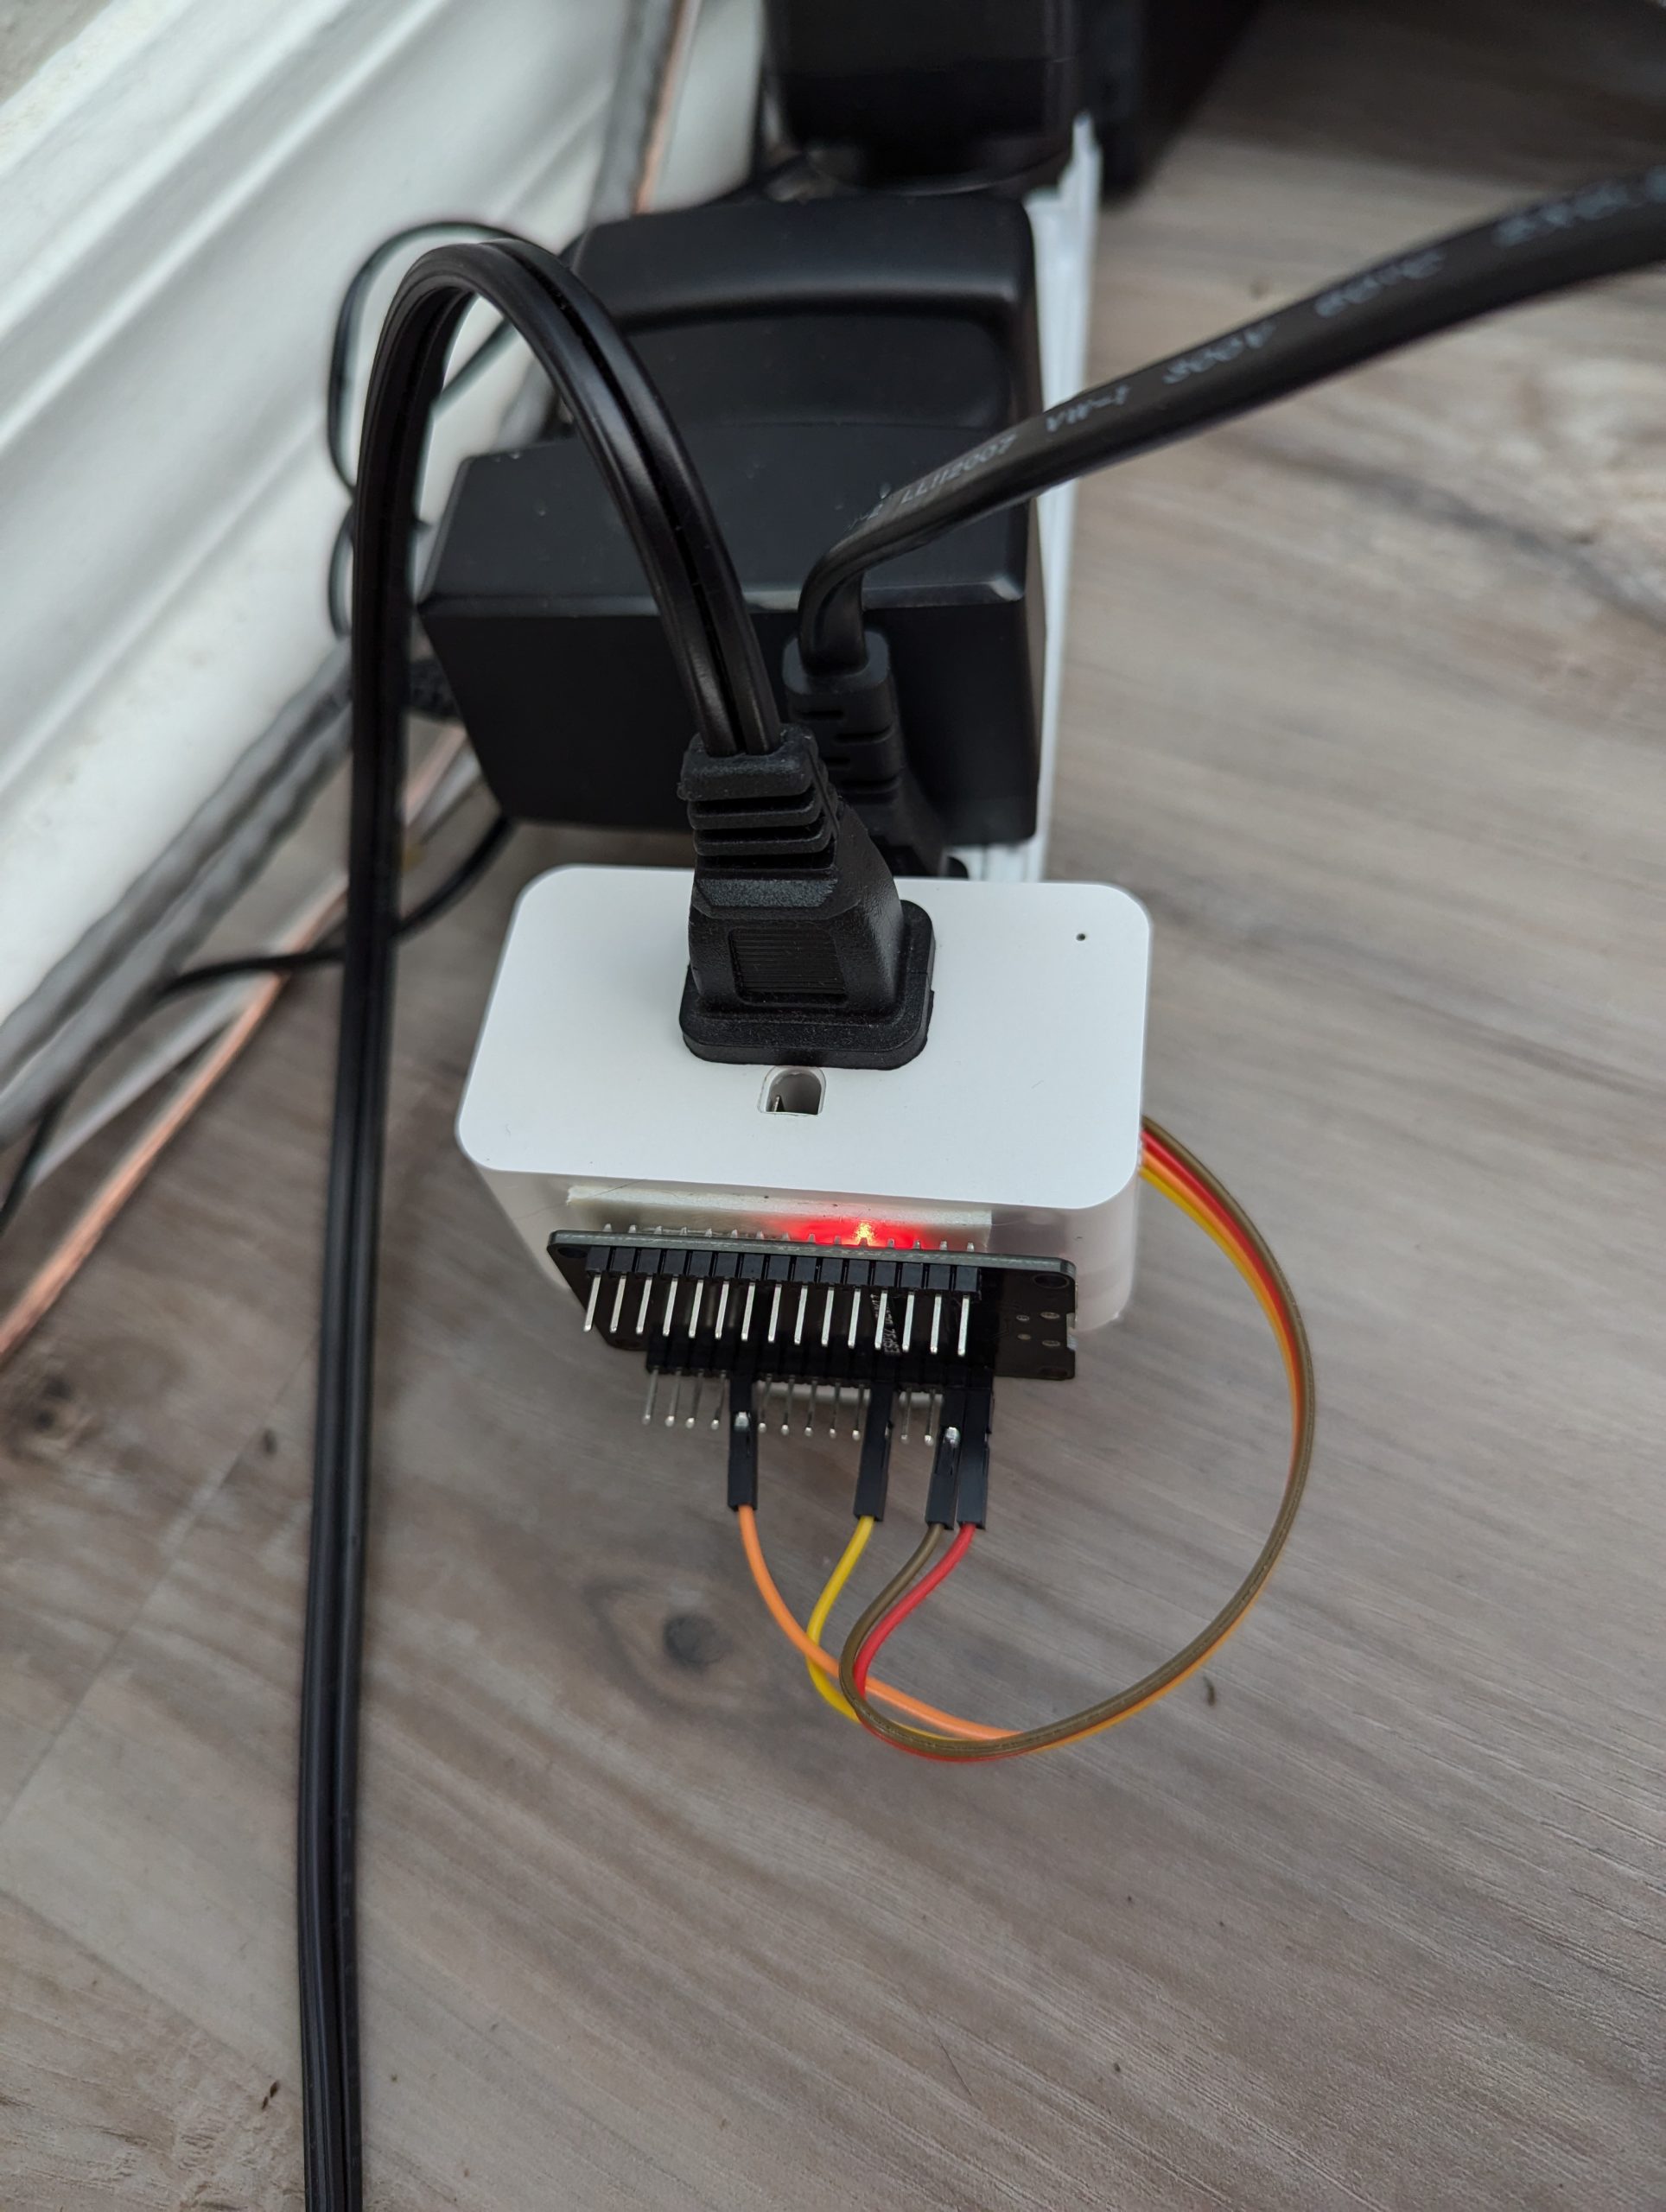
My two wall switch controllers are similarly simple. I purchased Roku WiFi wall switches and gutted the microcontroller, which was coincidentally also an ESP32. I theoretically could have found a way to flash that chip, but it was easier to tape one of my ESP32 dev modules on the side and solder for wires for power, ground, relay control, and sense input from the button. The Arduino code contains an override to toggle the relay when the button pin goes low, in case the web interface is not accessible or I don’t want to get out my phone every time I need to switch off the lights.
Python Code
Lorem Ipsum
HTML Code
Lorem Ipsum
Arduino Code
Lorem Ipsum
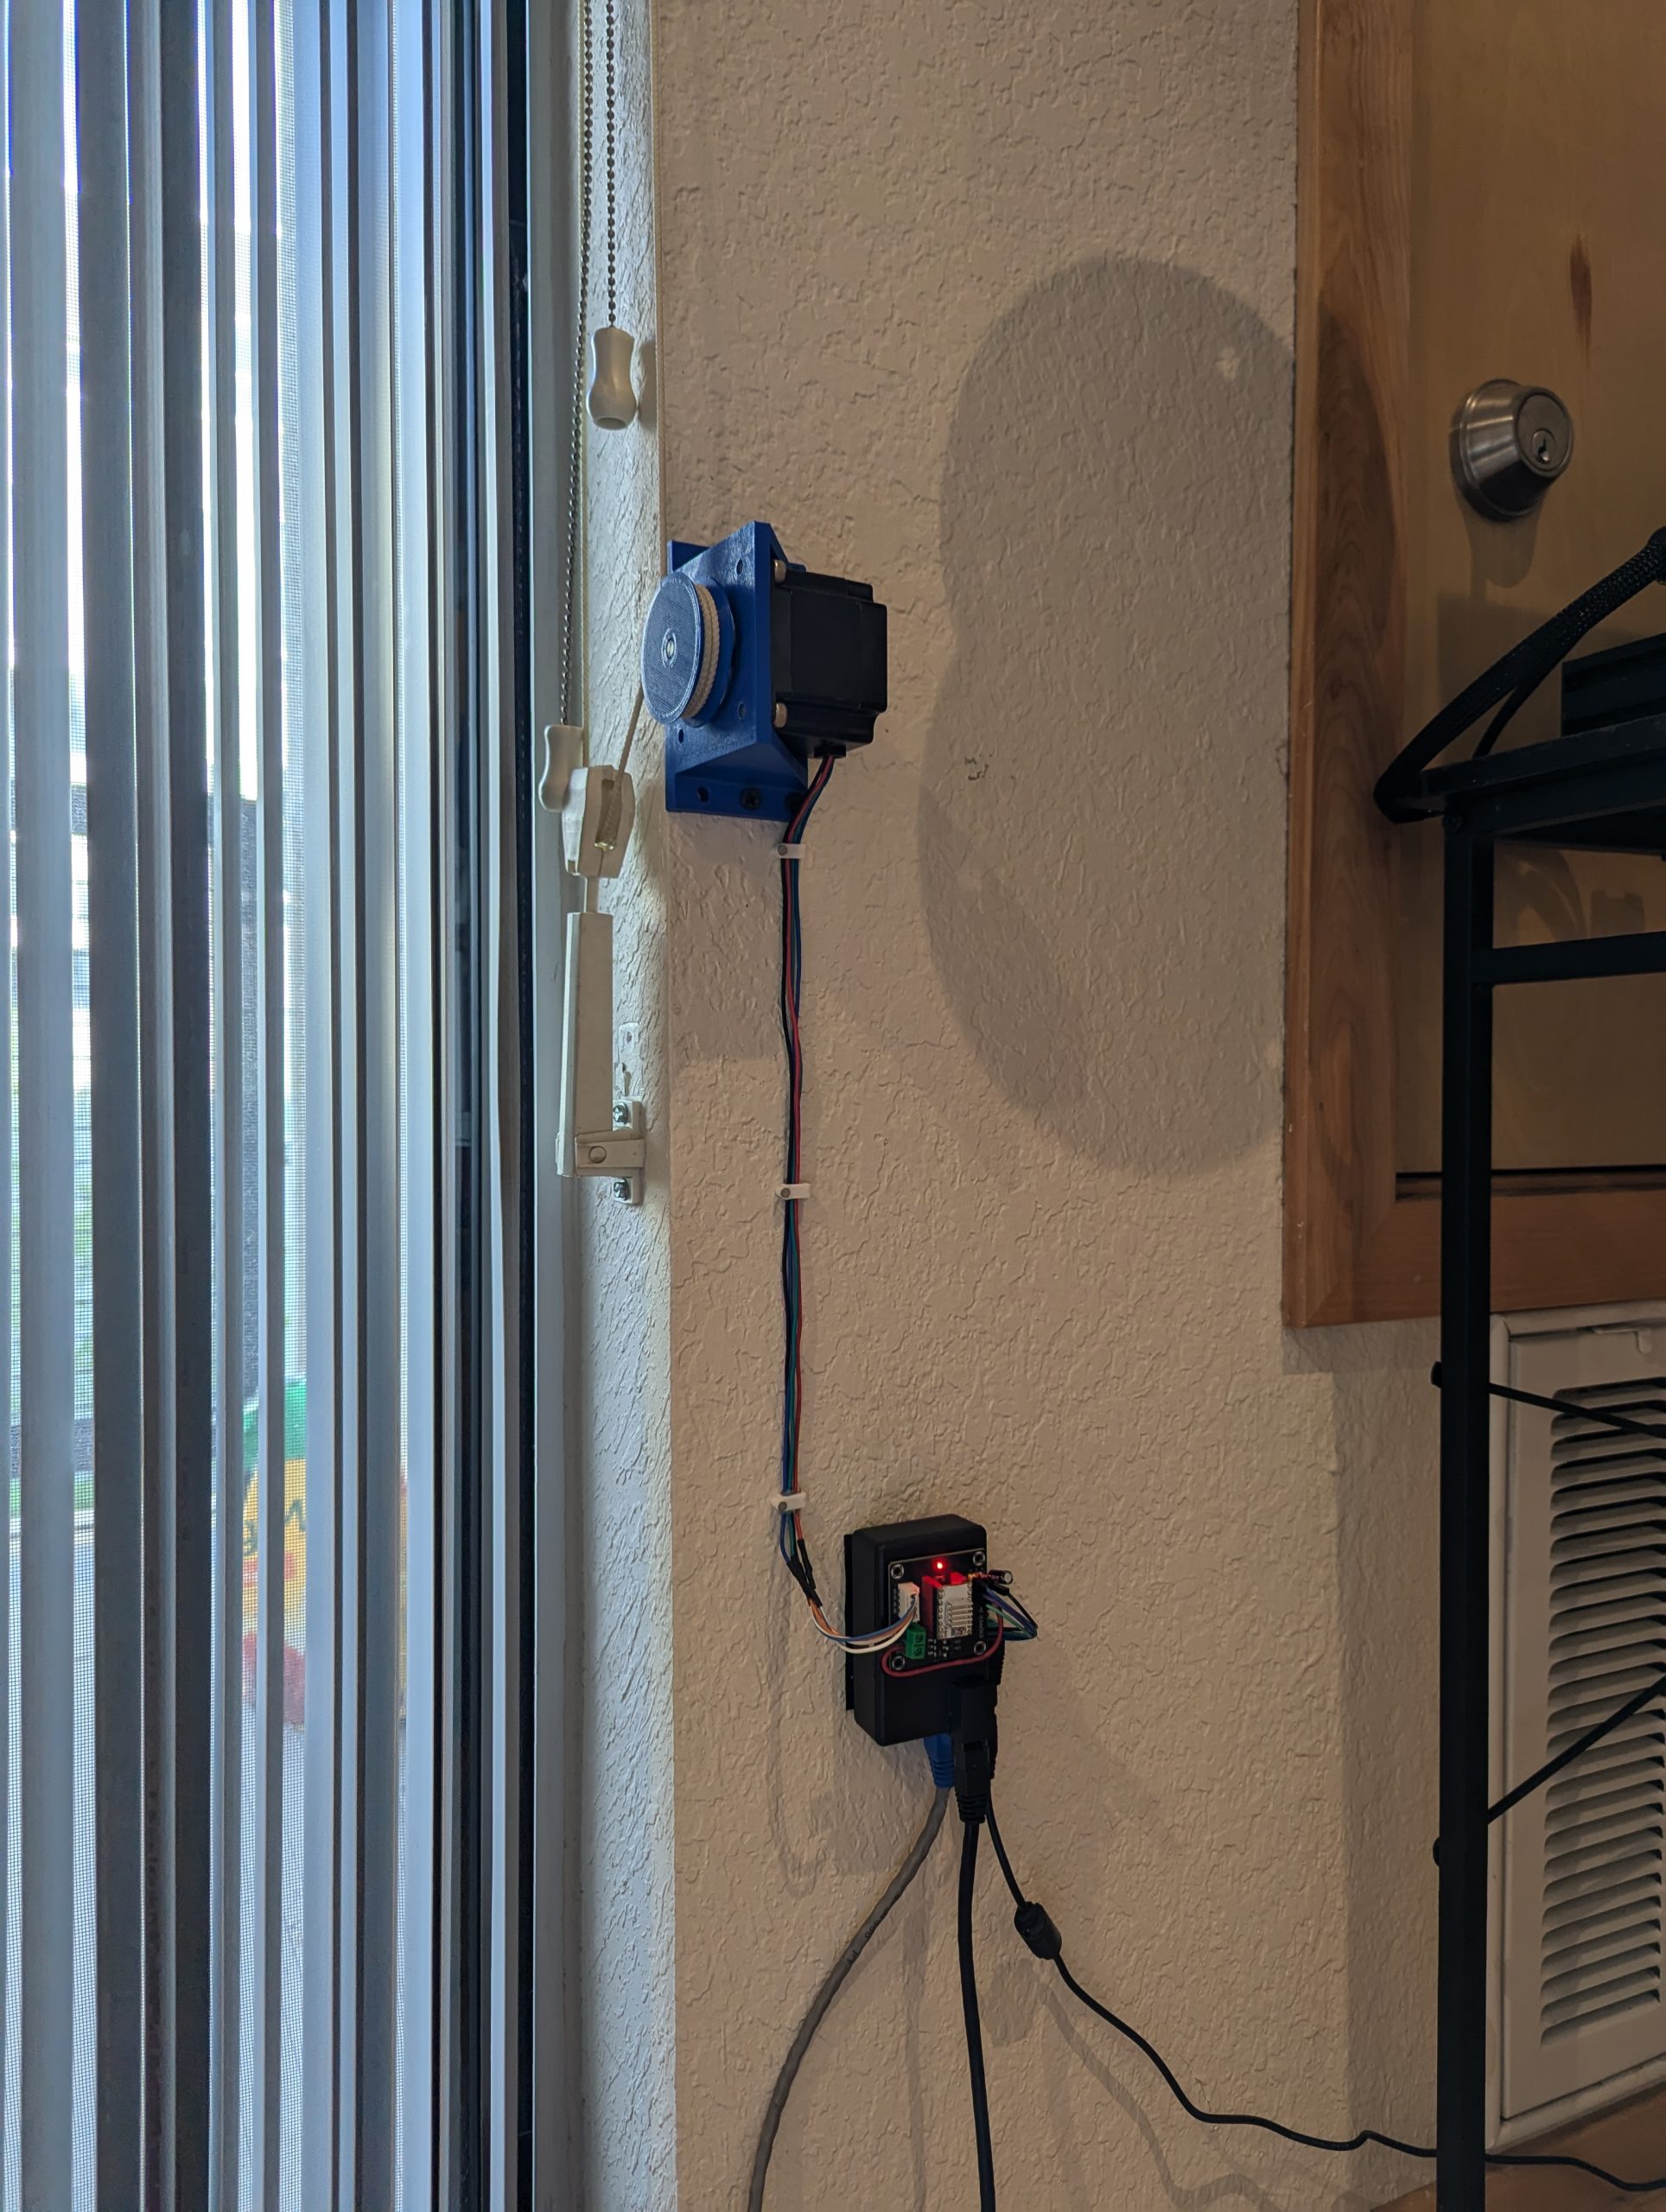
Integrating Plant Watering & Window Blinds Control
I am currently working on another project, found in a different tab on this site, to automate care of some houseplants, as well as the opening and closing of my blinds using a separate Raspberry Pi and a single continuous CAN bus. After I finish wrapping that up, I intend to expand my little lighting control web page to include buttons for opening and closing the blinds in my living room and bedroom. My lighting control Pi would then send messages over my local network to my Plant Care Pi, which will send the appropriate message over CAN bus to my blind motor node.
Installation Tutorial
Steps for setting up Lighting Controller on new Raspberry Pi:
– Set static IP: sudo nano /etc/dhcpcd.conf
interface eth0
static ip_address=192.168.1.100/24
static routers=192.168.1.1
static domain_name_servers=192.168.2.1
– Install VNC: sudo apt install realvnc-vnc-server
– Change VNC Password: vncpasswd
(Restart VNC Server): sudo systemctl restart vncserver-x11-serviced
– Install Flask globally: sudo apt install python3-flask python3-paho-mqtt
Verify: python3 -m flask –version
python3 -c “import paho.mqtt.client as mqtt; print(mqtt.__version__)”
– Copy pyhon to a file called app.py in a folder labeled Lighting_Controller. Also in this folder should be a sub-folder with the name Templates in which the HTML for the project is saved as index.html.
– Create a Systemd Service file: sudo nano /etc/systemd/system/lighting_controller.service
and add this to it:
[Unit]
Description=Lighting Controller Flask App
After=network.target
After=mosquitto.service
[Service]
ExecStart=/usr/bin/python3 /home/CharlesG/Lighting_Controller/app.py
WorkingDirectory=/home/CharlesG/Lighting_Controller
StandardOutput=inherit
StandardError=inherit
Restart=always
User=CharlesG
[Install]
WantedBy=multi-user.target
– Enable and Start the Service: Enable the service to start automatically at boot and run it:
sudo systemctl enable lighting_controller.service
sudo systemctl start lighting_controller.service
(and verify that it is running):
sudo systemctl status lighting_controller.service
How to check ports:
For Flask: sudo lsof -i :5000
For MQTT: sudo lsof -i :1883
1. 1. Install Required Software
Start by updating the system and installing the necessary software packages:
sudo apt update
sudo apt upgrade
sudo apt install python3 python3-pip python3-venv mosquitto mosquitto-clients
This installs Python 3, pip (Python package manager), and the Mosquitto MQTT broker.
2. 2. Set Up a Virtual Environment for Python
Navigate to your project folder and create a Python virtual environment:
cd /home/CharlesG/Lighting_Controller
python3 -m venv venv
source venv/bin/activate
Then install Flask and the MQTT client inside the virtual environment:
pip install Flask paho-mqtt
3. 3. Configure Mosquitto
Ensure Mosquitto is properly set up by editing its configuration file. Open it with:
sudo nano /etc/mosquitto/mosquitto.conf
Make sure it includes the following lines to allow remote connections:
listener 1883
allow_anonymous true
After editing, restart the Mosquitto service:
sudo systemctl restart mosquitto
You can test Mosquitto by subscribing and publishing test messages:
mosquitto_sub -h localhost -t test
mosquitto_pub -h localhost -t test -m “Hello, MQTT”
4. 4. Set Up the Flask Service
Create a systemd service file for your Flask app to run it automatically on boot.
1. Create a new systemd service file:
sudo nano /etc/systemd/system/lighting_controller.service
2. Add the following content to the file:
ini
Copy code
[Unit]
Description=Lighting Controller Flask App
After=network.target
After=mosquitto.service
[Service]
ExecStartPre=/bin/sleep 10
ExecStart=/home/CharlesG/Lighting_Controller/venv/bin/python /home/CharlesG/Lighting_Controller/app.py
WorkingDirectory=/home/CharlesG/Lighting_Controller
StandardOutput=inherit
StandardError=inherit
Restart=always
User=CharlesG
[Install]
WantedBy=multi-user.target
3. Save and exit.
4. Reload the systemd daemon and enable the service:
sudo systemctl daemon-reload
sudo systemctl enable lighting_controller.service
5. Start the service:
sudo systemctl start lighting_controller.service
6. Check the status of the service:
sudo systemctl status lighting_controller.service
5. Automatically Restart Flask on Boot
Since the Flask service wasn’t responding immediately after a reboot, we used a cron job to automatically restart the Flask service after 30 seconds.
Open the crontab editor:
sudo crontab -e
Add the following line to restart the Flask service 30 seconds after boot:
@reboot sleep 30 && systemctl restart lighting_controller.service
Save and exit.
6. Test the System After Reboot
Reboot the Pi:
sudo reboot
After rebooting, check if the service is running and test the functionality by accessing your Flask app via the web browser and ensuring that your MQTT-controlled devices respond to the commands.
sudo systemctl status lighting_controller.service
If everything is working, the webpage should load, and the devices should respond to the commands sent from the Flask app.
5. Summary of Key Steps:
1. Install required packages (Python, Mosquitto, Flask, etc.).
2. Set up Python virtual environment and install Flask and paho-mqtt.
3. Configure Mosquitto for MQTT messaging.
4. Create a systemd service to run Flask automatically on boot.
5. Use a cron job to restart Flask after boot to handle potential startup timing issues.
6. Test to ensure everything works after reboot.